SV Unladen Swallow - The Custom Fabrication aka the money pit
We bought a great sailing boat. What we did not buy was one with easy water access, amazing solar panel capacity and an interior setup to keep a married couple comfortable as we went about our daily lives in terms of storage, ready access to tools and comfortable places to relax and watch TV.
The boat did have the ultimate hard top dodger/ bimini that was the envy of most anchorages.
What follows is our quest to solve some of the what we perceived as deficiencies. All it takes is imagination, expertise, material, time and money...
Fabrication - 2021
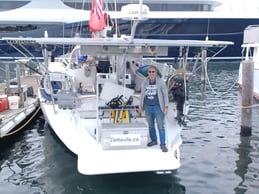
Swim Platform
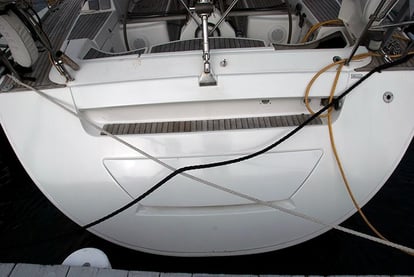
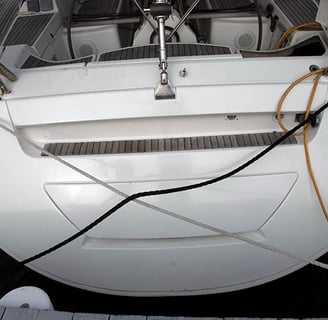
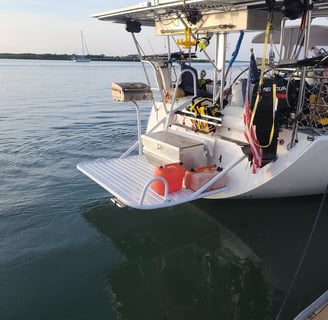
The original swim platform on the back of the boat was wide enough to put a foot on. But we’re scuba divers. As you can see by the picture below, the old swim platform was only 5′ wide and 18″ deep, just enough to stand on. We couldn’t imagine using this to get in and out of the water in full scuba gear. (Note: the previous owner always dove off his dingy, never off the boat.)
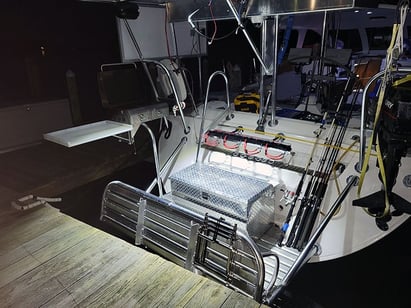
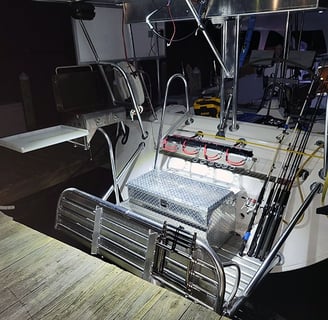
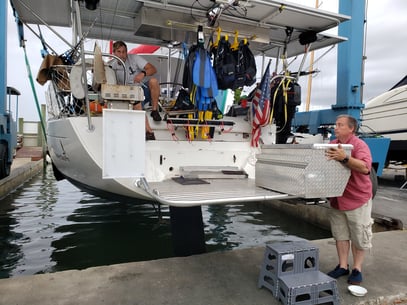
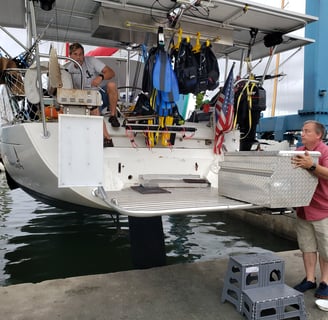
We needed something more. We reached out to Marine Fabricators, owned by Earnie, who came up with a swim platform that gave us room for a box that doubles as a seat, someplace to put the tanks to gear them up, and includes a ladder for climbing back aboard.
We worked through issues collaboratively with him to come up with the final design.
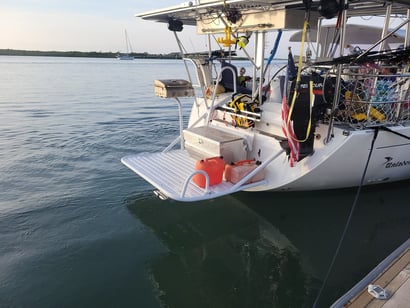
Notice the grill and the big white cutting board (fish cleaning station). The grill is a great idea, although it is pretty exposed and only lasts two years. The cutting board on the other hand was not a good idea–it’s tough to see in the picture, but it does fold down….right into the oncoming water when we’re heeled over. Also, it was too far back and not stable to work on, especially underway. We removed the cutting board when we got to FL. The cutting board itself is stored behind the scuba tank holder and pulled out when we need it. The mounting brackets are have been recycled.
The plan was to coat the platform with white lineX to protect the aluminum, but with COVID we couldn’t find a shop with material in VA that could to it. So we headed for FL with the intent of getting it done later.
When we got to Ponce Inlet, FL, we found a local dealer who could do it, and arranged to haul the boat to make it easy to remove the platform and have it done while we visited with family.
Now that the platform is coated and protected, we can turn our attention to the other unforeseen design feature, it drags in the water when we sail. This was costing as much as 1 to 1 1/2 knots when we sailed. (We have had the handhold — that loop in front of the red gas can — under water when sailing.)
However, it was wonderful to have this platform on the back of the boat so we could swim and scuba dive. We will deal with the drag in 2022.
Rudder Repair - 2022
Sea Love Boat Works, Ponce Inlet, FL
There are several lessons to be learned from this part of our Journey.
Sonar is your friend – we didn’t have it installed yet
Take into account the swell when watching depth – a foot up and down is 2 feet off the charted depth
Go with your gut – we should have just had a new rudder made – it would have been cheaper and quicker
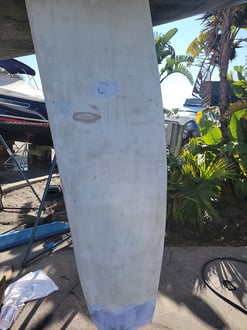
Sea Love Boatworks decided to just rebuild the bottom of the rudder once we had the boat out of the water. I expected them to cut the rudder off square and carve a piece of foam core to shape and cover it with fiberglass. They chose to use heavily thickened epoxy filler and try to cover it with 7 or 8 applications, to fill in the bottom of the rudder. Then the plan was to sand it back some more and reskin the bottom of the rudder. Well as they sanded back further, we found stress cracks, that led to more sanding and more sanding and finally a complete new skin.
While I am fairly happy with the results (they could have faired it out cleaner) we are getting good performance out of it.
My issue is the time and cost associated with the repair because they tried to do it their way vs what I suggested. This delayed our departure to the Bahamas by most of a month unfortunately.

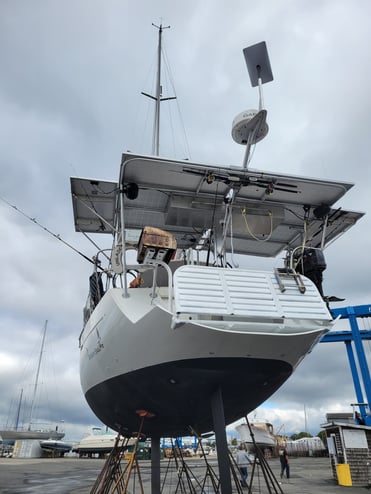
RADAR/ Starlink Mount
Objective – Move the RADAR Mount from the mast where the Jib was hitting it to behind and above the Solar Arch and provide a place to mount a Starlink Antenna
Brian at Fairhaven Shipyard worked with Lee to design a great solution as you can see. The Starlink pole is fixed inside of a tube that is just the right inside diameter to hold the stock Starlink mount. The power and data wires are run down the mount and into the wire races in the Solar panel arch and down into the Lazzarettes.
Masthead Mount
Objective – needed to mount a 2nd VHF antenna as well as accommodate 2 cameras. Needed to also account for the existing wind indicator and wind instrument.
Brian took the antenna mount that Erny had originally created and built it into a brand new mast head cap. We ran into some clearance issues with the original wind indicator (it needed to be retired anyway) so had to add an extension to provide the clearance for it and the masthead light. The Garmin camera is mounted and faces down and forward. There is room and already wiring in place to support the FLIR camera in the future.
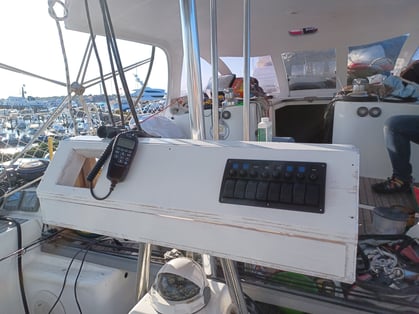
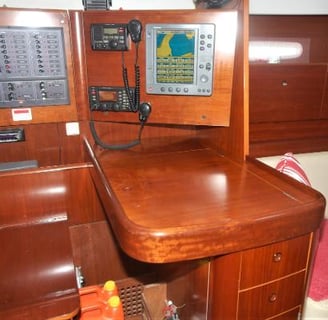
Helm Station Instrument Panel
Objective – provide a home for a new switch panel and move the engine instrumentation up where it was easily seen.
We have been thinking about this project for over a year. Originally we just mounted an aluminum bar on the Helm support to hold the 2 chart plotters and Radio Hand Set. This worked fine for the first year, but we had bigger plans.
Ideally this would have been made out of fiberglass or Starboard, but we ran out of time and cobbled something together using Marine Plywood coated in Flex Seal rubberized waterproof sealer.
We mounted a new electrical switch sub panel to accommodate:
New Fuel Polisher switch
Fuel Transfer pump switch (moved from under the berth)
Horn
New Stern salt water rinse (think cleaning up after cleaning fish)
Switch for Spotlights on the bow
there are some spares for future growth (good idea fairy never sleeps on this boat)
We also wanted to move the engine monitoring up to where we could see it. This became much more interesting as we dug into the existing wiring and the factory wiring diagram. When all was said and done, we installed a new 3 position switch panel and then used the existing Hobbs Meter. The 2 switches are for the Glow Plugs, Start/Run and Stop.
There is also a new alarm controller from Yacht devices that has an acknowledgement push button that needed a home.
To all of this we added a couple of radio handset clips, 2 speakers (alarms and radio), the chart plotter mounts, a tablet mount on top and behind and finally 4 cup holders.
Right now this is still considered version 2.5 with a nicer version 3 when I have more time and access to materials or a craftsman that can make something nicer. But for now this is much better than anything we’ve had to date.
Fairhaven Shipyard Fabrication - 2022


Sugar Scoop
Fairhaven Shipyard – Fairhaven, MA
When the swim platform was added to the stern, we didn’t realize how much drag it added. Once we were sailing and looked back at it, we realized it acted as a drag brake on the back when we were heeled over. The idea of the Sugar Scoop, extending the lines of the hull around the swim platform, was born.
Lee called around to various shipyards prior to us heading north until he decided we would get the work done in Fairhaven, MA, at the Fairhaven Shipyard. They were one of the few shipyards that could handle a boat our size and all the work we wanted to get done over the summer. And their prices were reasonable.
Lee discussed the work to be done with the guys doing the work, and they went to work. As part of this work, they moved the hinge point on the swim platform to coincide with where the sugar scoop would intersect the platform. This shortens the height of the part that swings up.


Carpentry, Electrical and Electronics - 2024 i.e. time to make the inside more functional
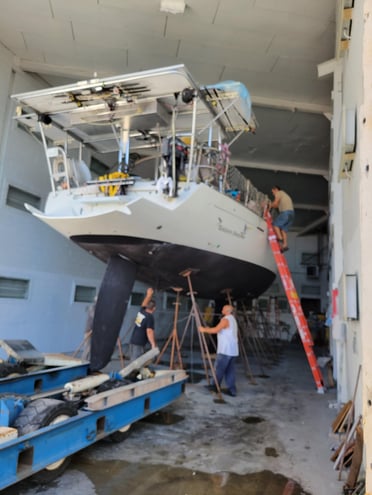
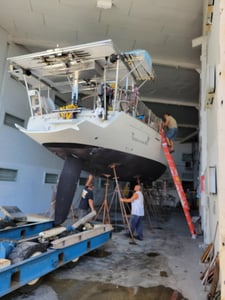
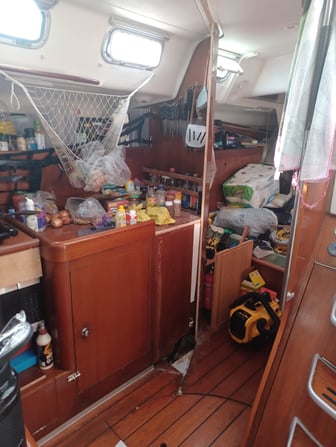
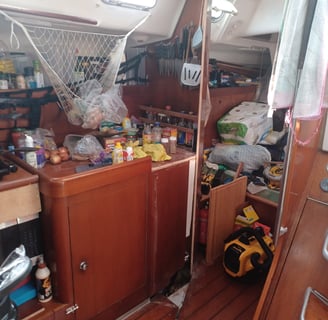
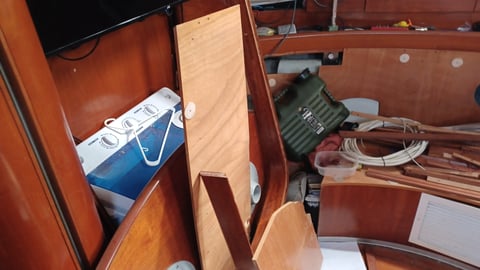
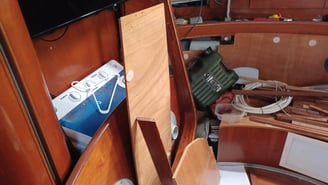
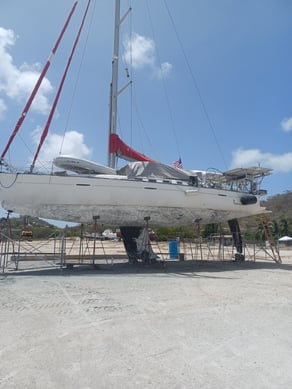
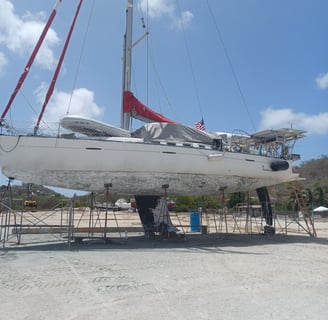
Like everything else that was involved with the refit during haul out, Hurricane Beryl interrupted our work. What follows is the plan and some pictures of the progress we had made. When the boat fell over and the hull caved in, the cabinetry and bulkheads on the port side were all dislodged and many shattered as they were up against the hull and when it caved inward it pushed the interior wood out of the way.
Carpentry work in the interior
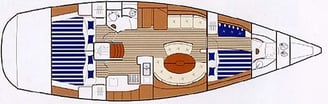
The interior of the boat was designed over 20 years ago to meet the needs of a crew of 9 or more doing offshore racing. It was designed with 3 staterooms each with a double bed and then the Salon table could also be reconfigured for another double berth and finally a single berth area also in the salon that once fitted with a lee cloth could be used for a crew member underway. The boat had 2 heads - one all the way forward in the bow, forward of the master's berth, and then a more roomy head (the day head) in the salon area. The 2 aft berths were located on either side of the main engine space and under the cockpit. There was a traditional Navigation station adjacent to the salon head that had mounting space for a chart plotter, radios and the electrical panels. Finally, the galley area was an L shape on the starboard side at the base of the companionway.
So our list of complaints after living on the boat for 3 years
While the interiors was nicely appointed in cherry, we found the lighting a bit dark - especially to do any kind of maintenance work at night.
While fairly spacious, for our needs as a couple cruising full time, we found the layout not as effective as it should have been given the amount of space (almost a 15' beam) available. Storage space was plentiful, but most of it was buried deep and inconvenient to access.
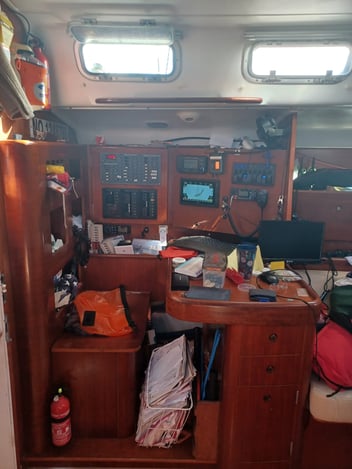
While we know how to use paper charts, we have 3 chart plotters, and several mobile devices all receiving GPS and able to be used to plan and manage our passages. This made the Nav station just wasted space with a horizontal surface that just collected stuff.
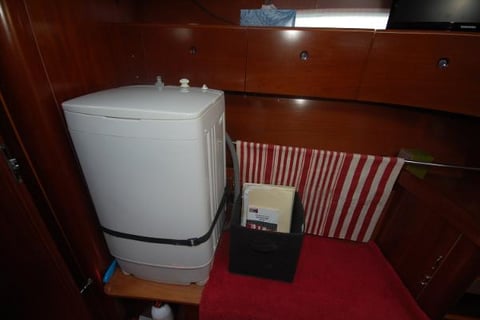
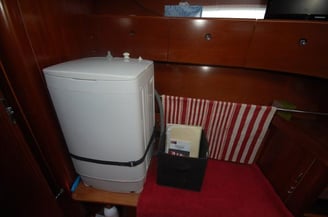
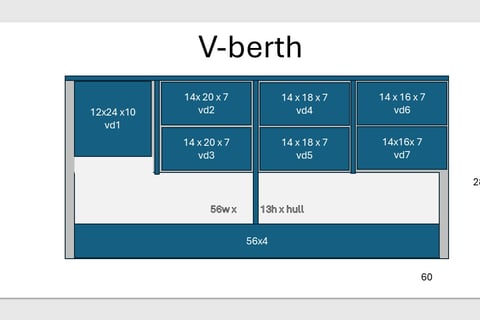
In the forward berth, there was a seating area (couch) on the port side that was clearly an afterthought. We used the space to hold our Engels powered cooler.
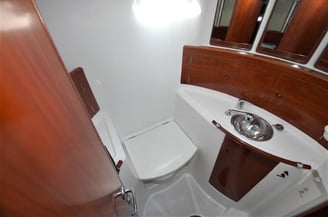
The cat's litter box sat on the floor of the forward head making that already cramped space unusable for anything but some storage and it was not setup to facilitate that either.
The Starboard berth hatchway is very narrow and it pinches the side of the galley making access to our top loading deep freezer challenging especially for someone shorter than almost 6' tall.
There was really no place below to stretch out and lounge other than a berth. The salon table area was fine for eating but we could never get comfortable to watch our large TV that was mounted on the bulkhead adjacent to the mast that separated the Salon from the forward berth.
So with this extensive list of gripes we decided to start a major renovation of the interior to make it more useful for us.

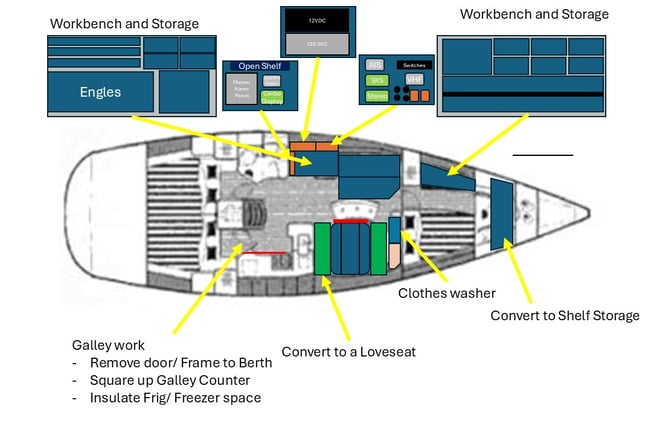
Our list of projects:
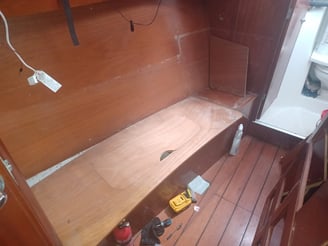
Starboard AFT berth – convert to storage, including opening up the hatch/doorway to allow for larger items
Galley – Square up the corner of the countertop closest to the berth (now) storage to make it easier to access the freezer
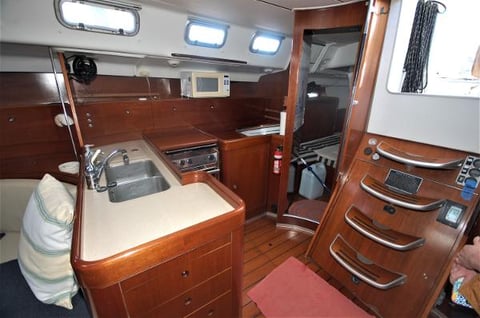
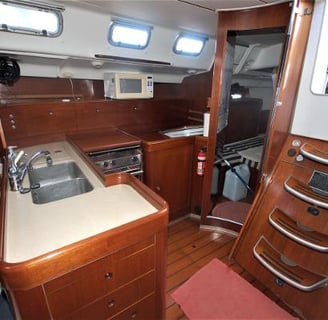
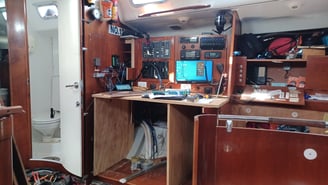
This is as far as we got - the doorway frame and associated bulkhead is cut away - this made the galley much easier to use. We still needed to refinish this area
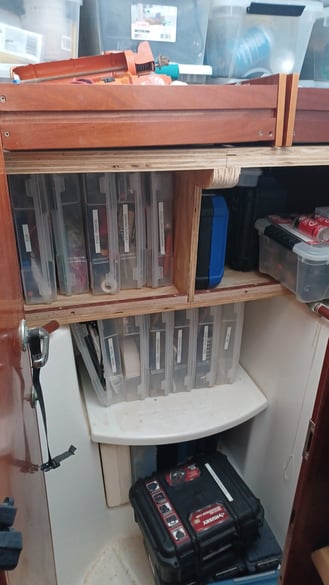
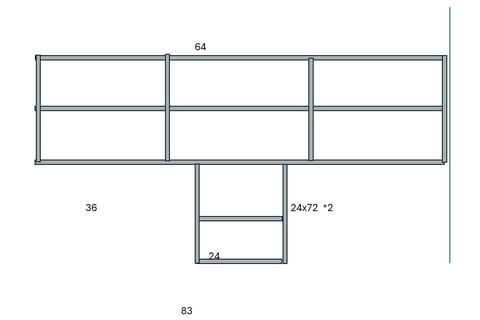
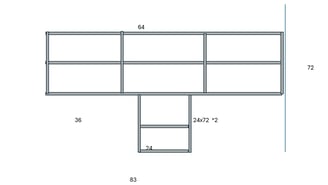
Navigation Station – convert to Engels pull-out slider, Tool chest and work area, update electronics and electrical systems there

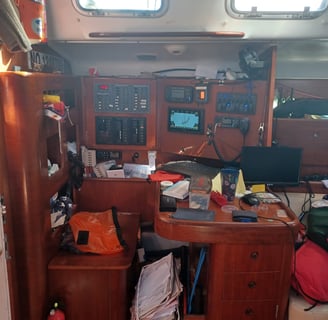
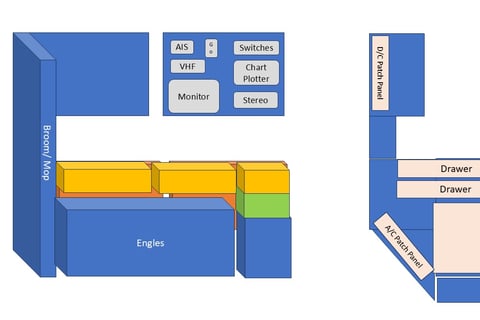
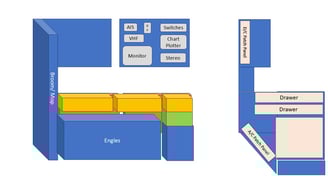
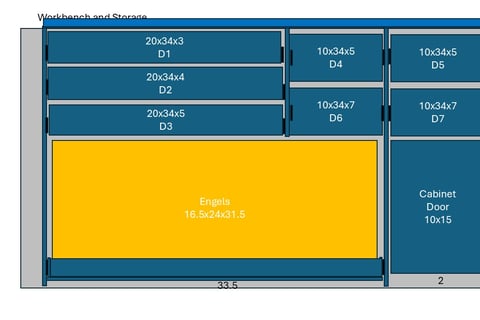
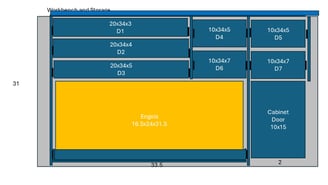
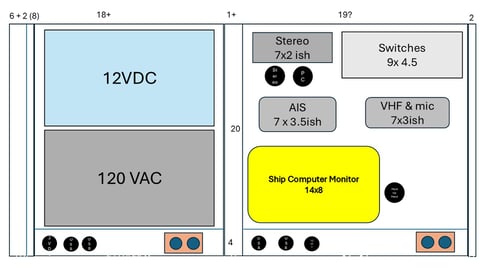

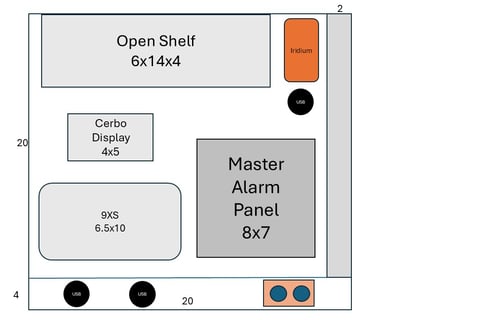
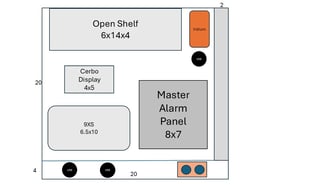

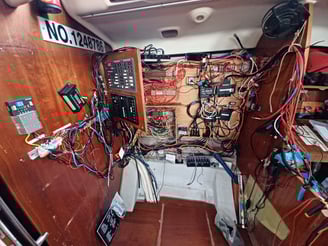


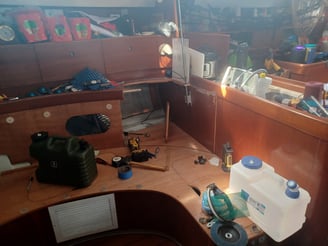


Electrical and Electronics Ramifications
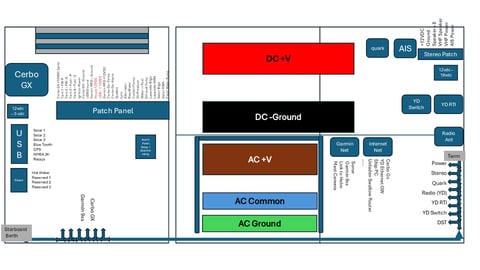
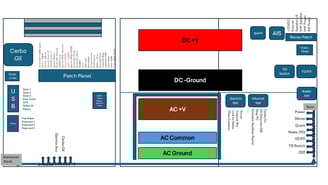
As you can see by the pictures and diagrams above, this interior redesign was a significant impact on the boat's electrical and electronics systems because the heart of those systems was located behind the nav station. There were several issues that we took the opportunity to address since we were here:
There was a nagging drip from a stanchion that was located directly above the original DC electrical patch panel that was causing corrosion issues - we needed to relocate that panel so it wasn't getting dripped on
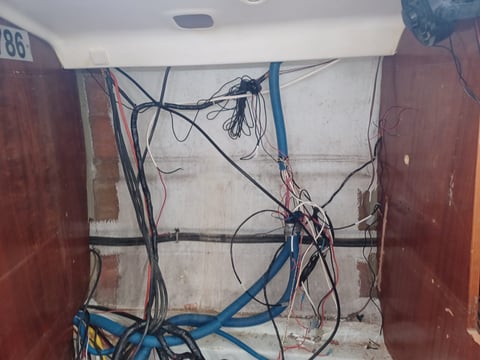
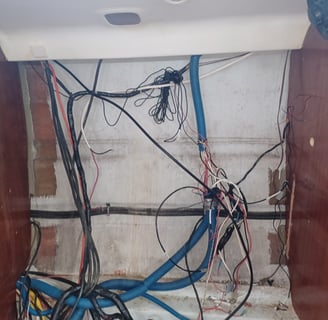
As we had added both electrical and electronics items over the previous 3 years of refit, this area had become a tangled mess as it was never intended to host so much equipment and associated wiring. We needed to clean this all up.
As we were adding a Master Alarm panel that had over 30 new connections associated with it, we needed to make room to manage all of that wire
We knew the new workbench was going to need power, so we planned ahead with plenty of DC, USB and AC power available
When we redid the AC Electrical Patch panel originally, we where not happy with the results - it was not anywhere as neat as it should have been and was taking up valuable space
We knew we had some dead wiring and some abandoned conduit - time to clean it up
We had some good ideas that turned out to be not so great, that needed to go away - time to clean them up also
So that is quite a list - it took me 2 weeks of 8 hour days to do the demo and put it all back together. Fortunately, Beneateau numbers each conductor on the boat uniquely and provides a key to those wires. This index/ key was invaluable to rebuild both the DC and AC systems. Even with that help, there were still some gotchas that took a few hours to work through - especially the way the overhead lights were wired.
Overall, we were pretty pleased with the results so far. The boat was coming back to life and as the carpentry was being assembled, I was installing more parts and pieces and making connections. We figured that I had made in excess of 400 connections from DC, AC, Network, NMEA 2000, Low power signaling and others.
Fiberglass - 2024 i.e. time to finally update the cockpit....
Like the other projects associated with the 2024 refit, this one was interupted by the Hurricane
Not many pictures for this part of the refit as it was mostly filling and patching holes.
The list of projects incudes:
Reseal the Hard Dodger
Fill all the holes associated with the original RayMarine instruments
Remove the old Man Overboard System (long since non-functional/ not repairable) and fill the mounting hole
Fill the holes assocated with the old speakers
Fill the holes associated with the original swim platform
I engaged with the recommended Fiberglass guy on the island and he was in the process of doing a great job and teaching me some tricks of the trade along the way.
So it was all going great and then the yard laborers finished the paint removal on the hull and keel and we realized that their work had left the hull badly scratched (gauged) and we would have to refair it so we could get a proper application of Coppercoat. There were also small osmosis blisters around all of the thru-holes that required remediation. This set us behind as it was several days of work and several hundred dollars in additional materials.
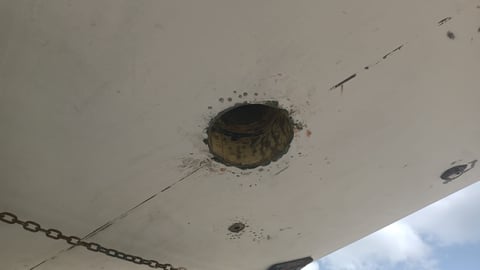
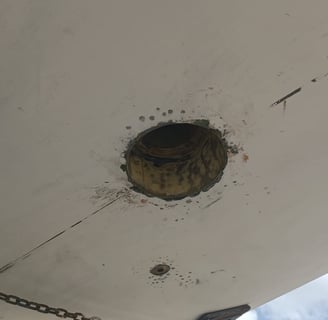
At this point, the Rudder finally was out of the boat and we discovered that the rudder stock also needed fiberglass work to properly fit the replacement rudder bearing. All of these delays - all caused by lack of experience on the part of the marina labor staff (skilled and unskilled) led to the rudder still laying on the ground when Hurricane Beryl arrived.
I want to emphasize that the fiberglass sub contractor did everything in his power to get us done, but the lack of timely process on the part of his co-workers did us in. He was actually finished with his work and was ready to start painting.